


安装Rclone
curl https://rclone.org/install.sh | sudo bash
安装完成后执行
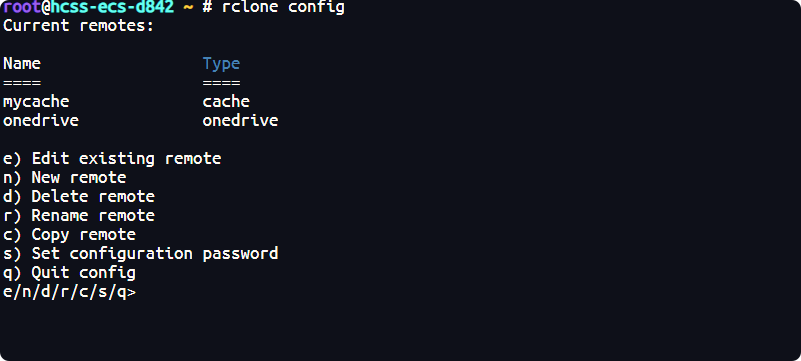
rclone config
按 n创建一个新的远程连接
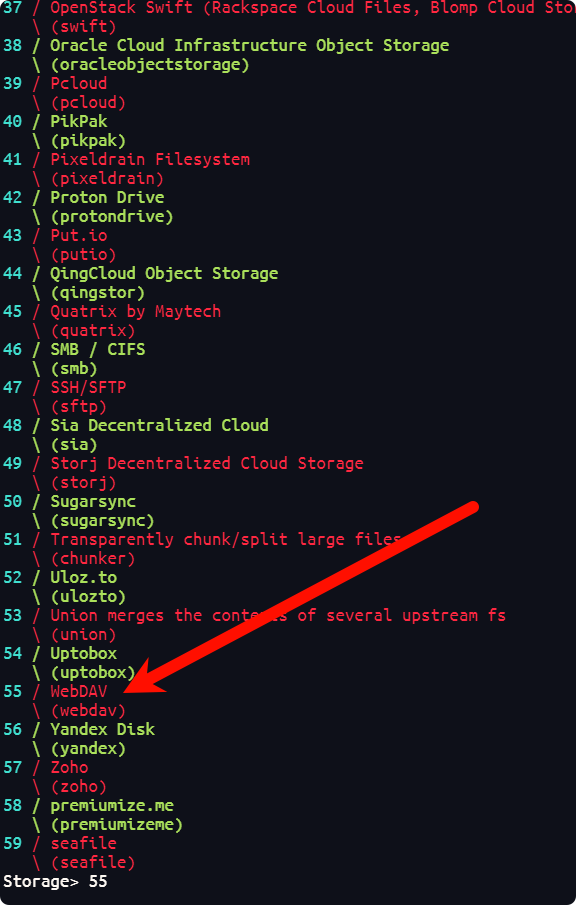
名称:随意 这里以cloud为例 回车后找到webdav,我这里的是55
回到123网盘--->工具中心--->第三方挂载--->webdav授权管理
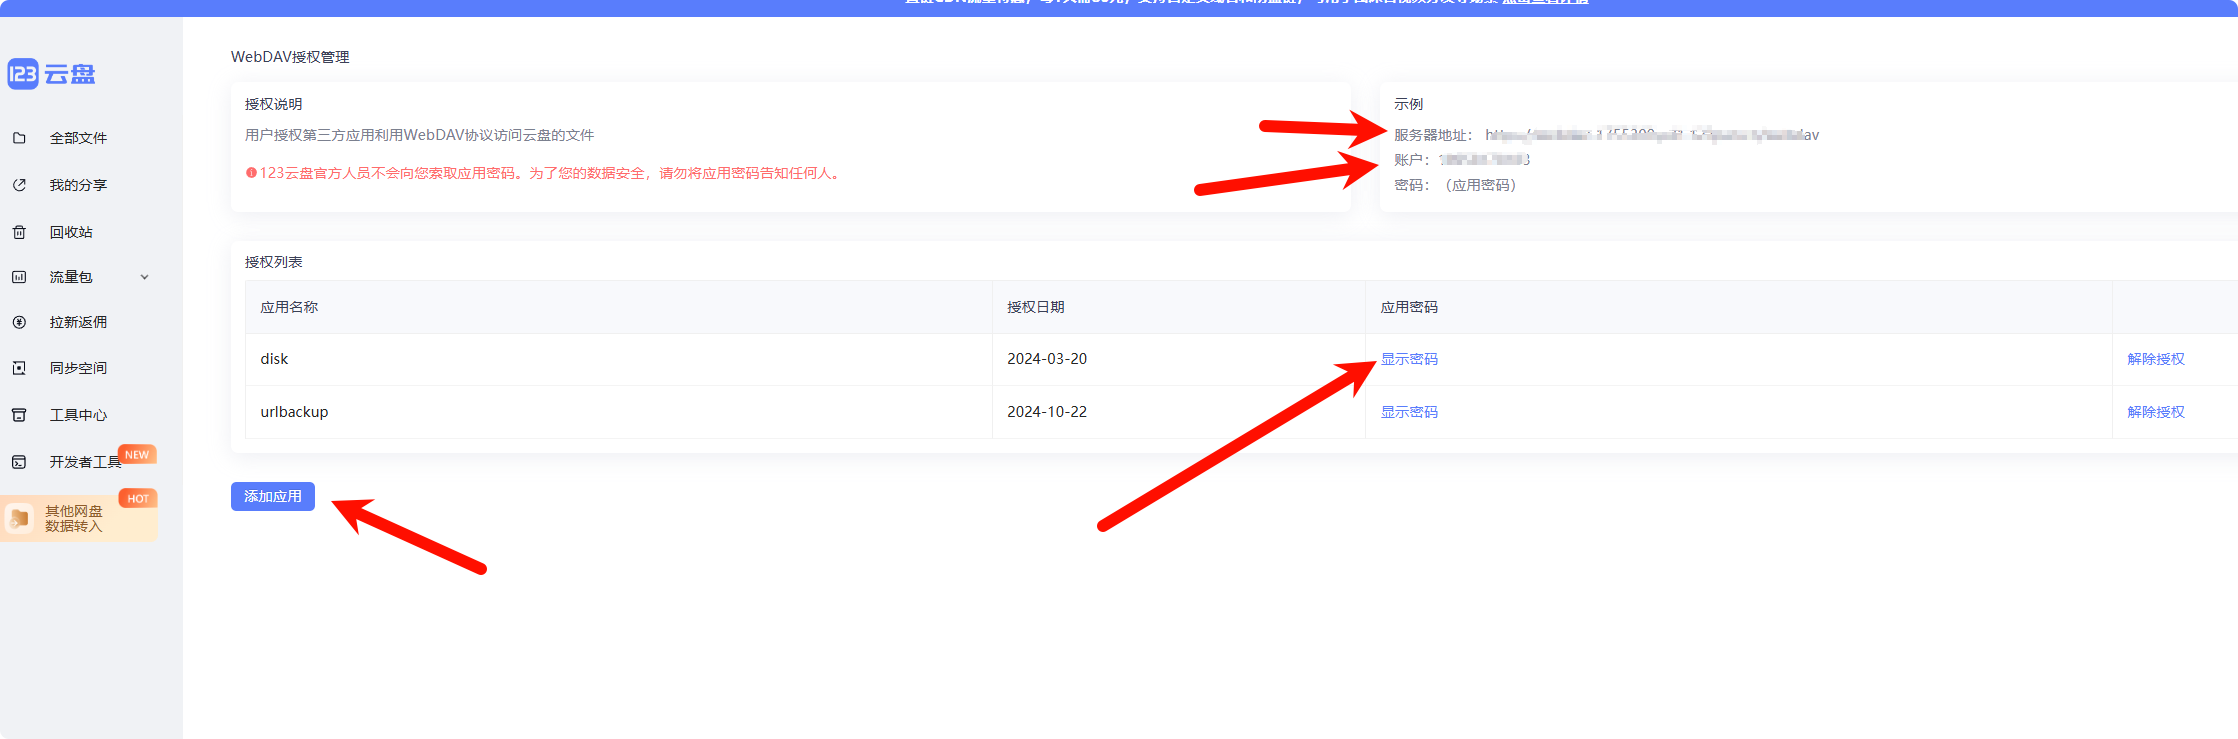
复制右上角的服务器地址,回到服务器粘贴
如果不想挂载在根目录,去网盘的根目录创建一个文件夹,这里以disk文件夹为例
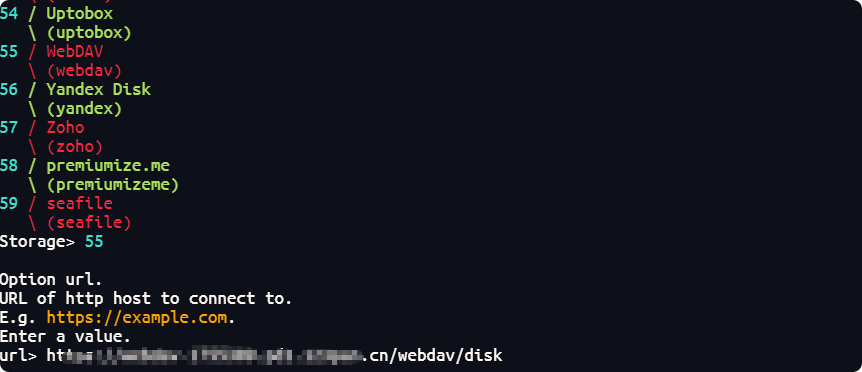
只需在webdav后面加上disk
如:https://webdav-xxxxxxxx.cn/webdav/disk
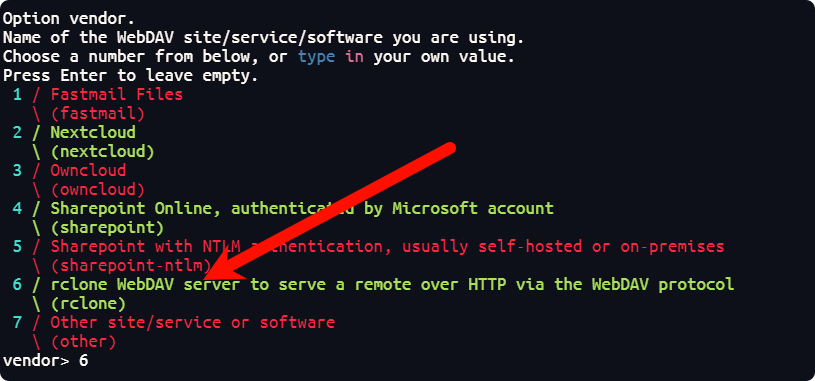
选择 6 rclone WebDAV server to serve a remote over HTTP via the WebDAV protocol Note:你的版本可能和我的不一样
回到123盘的webdav授权管理页面复制右上角的账户复制后填入服务器中

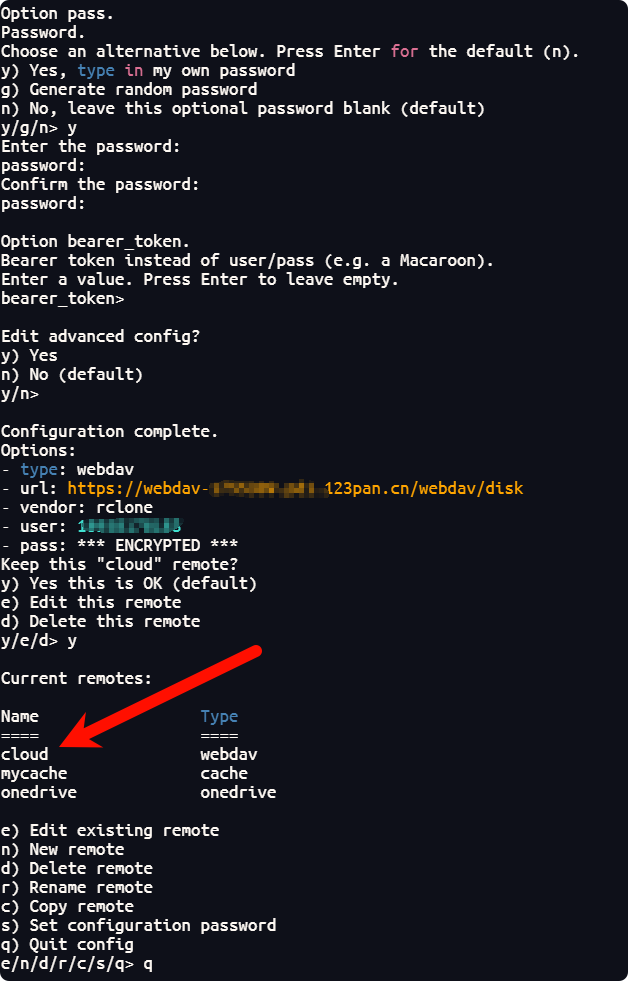
输入 y Yes, type in my own password 填入webdav授权管理中的密码

Note:linux中密码是不显示的粘贴后回车即可,需要输入两次,第二次是确认
提示输入bearer_token不用理会,直接回车
提示是否要进入高级设置默认是no ,直接回车
提示是否保留名为cloud的远程连接配置默认是y,直接回车
看到 Current remotes:并且正常显示出挂载名和挂载类型,这时已经配置成功 最后输入 q退出
重启后自动挂载
要让 rclone 的挂载在系统重启后自动挂载,需要配置一个自动启动任务。rclone mount 本身不会在系统重启后自动重新挂载,因此需要手动设置一个开机自动挂载的机制。
创建一个服务器的本地挂载文件夹
mkdir /root/123pan-dav # 路径和文件夹名字自行定义,这里以/root/123pan-dav为例
创建 systemd 服务文件
sudo nano /etc/systemd/system/rclone-mount@.service
# Note:如果系统提示没有nano命令,运行下面的命令安装后,重新执行上面的命令
sudo apt-get install nano
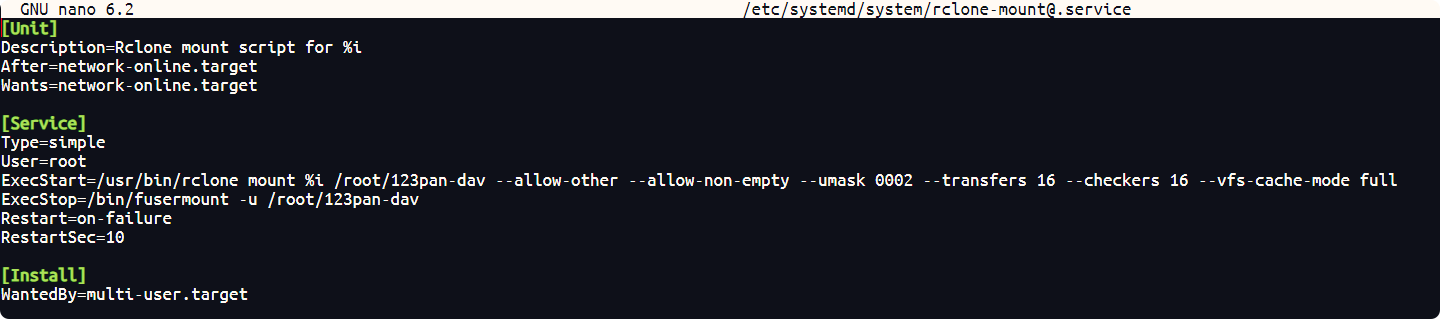
添加如下内容(注意修改部分)后保存退出 ctrl+x输入 y回车 :
[Unit]
Description=Rclone mount script for %i
After=network-online.target
Wants=network-online.target

[Service]
Type=simple
User=root
# 注意这里是服务器的登录用户名,记得修改下面的/root/123pan-dav路径
ExecStart=/usr/bin/rclone mount %i /root/123pan-dav --allow-other --allow-non-empty --umask 0002 --transfers 16 --checkers 16 --vfs-cache-mode full
ExecStop=/bin/fusermount -u /root/123dav
Restart=on-failure
RestartSec=10

[Install]
WantedBy=multi-user.target
启用服务
sudo systemctl enable rclone-mount@cloud:my-bucket.service # 使其在启动时自动启动
立即启动服务
sudo systemctl start rclone-mount@cloud:my-bucket.service
查看挂载状态
sudo systemctl status rclone-mount@cloud:my-bucket.service
如果服务正在正常运行,你应该能看到类似于 "active (running)" 的状态。

最后重启测试
reboot
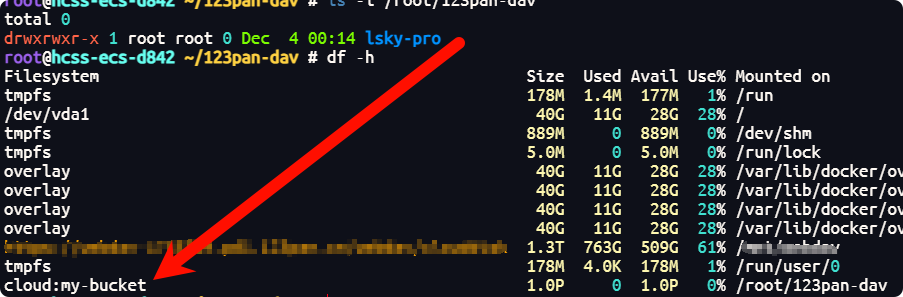
重启后运行
df -h
自动挂载成功:
评论区